Zendesk Integration Setup Guide
Last update: 22 June 2026
Connect your Zendesk account to Klarion and start importing support tickets for analysis.
Step 1: Open Integrations in Klarion
- Log in to Klarion using your admin credentials.
- Click Settings in the bottom-left of sidebar and go to Integrations
- Find Zendesk in the Feedback Sources section and click Connect.
Step 2: Connect Your Zendesk Account
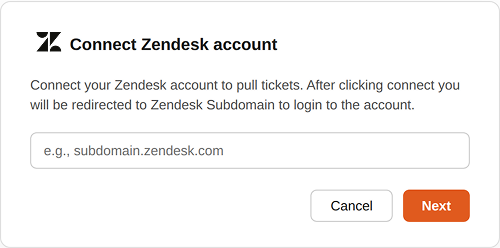
- Enter your Zendesk subdomain (e.g., yourcompany.zendesk.com).
- Click Next — you’ll be redirected to your Zendesk subdomain to log in.
- Sign in to your Zendesk account and grant Klarion access.
 Enter your Zendesk subdomain to connect and begin importing tickets into Klarion.
Klarion only reads ticket-related data. No data is written back to Zendesk.
Step 3: Configure Zendesk Import
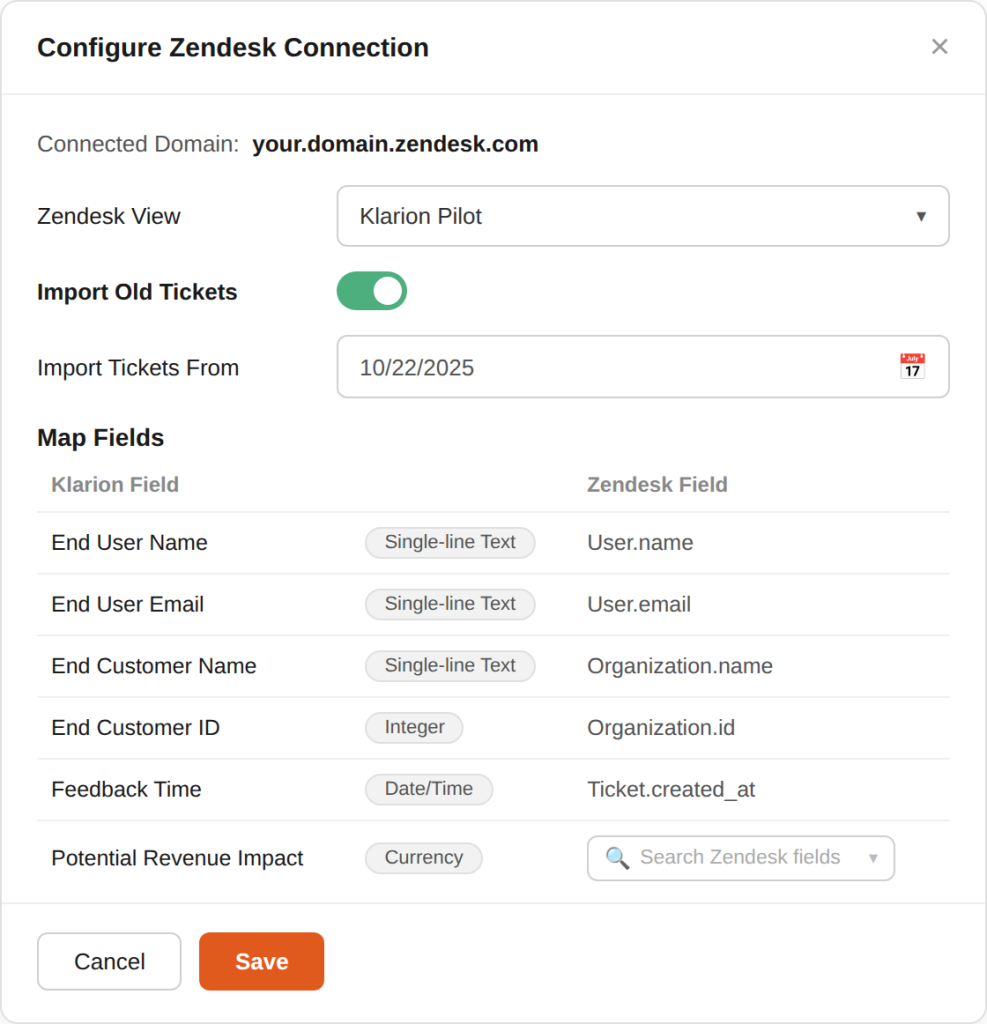
- Select the Zendesk view you want to import (e.g., All unsolved tickets, Support tickets).
- Choose a start date to import tickets from that point onward.
- Or select the option to import all available tickets and pull your full ticket history.
 Select your Zendesk view, set your import start date, and map fields to Klarion — including revenue impact.
Step 4: Map Fields, Save and Start Import
- Default Klarion fields are pre-mapped out of the box.
- Map any additional Zendesk fields you need. Field mapping can be updated at any time.
- Click Save. The ticket import starts automatically and runs in the background.
Setup Complete
- Zendesk shows as Connected in your Integrations settings.
- Tickets begin appearing in Klarion automatically.
- Field mappings are saved and active.
- Import is running in the background
Need Help?
Contact us at support@klarion.ai